Web Project Integration
eXBuilder6 is a web UI production tool, and the server can be linked no matter what language it is developed in. This chapter explains how to integrate with the Java server project.
eXBuilder6 Server Module Settings
The eXBuilder6 project can be deployed by adding it to the Web Project through deployment settings, just like the relationship between Java Project and Dynamic Web Project in Eclipse. For additional distribution of eXBuilder6 project, Dynamic Web Project needs to configure facet that can include eXBuilder6 project.
- After selecting the Dynamic Web Project created in the Project Explorer, right-click the mouse or press Alt+Enter to display the Properties dialog box.
- Select Project Facets from the tree on the left, and the following window will appear.
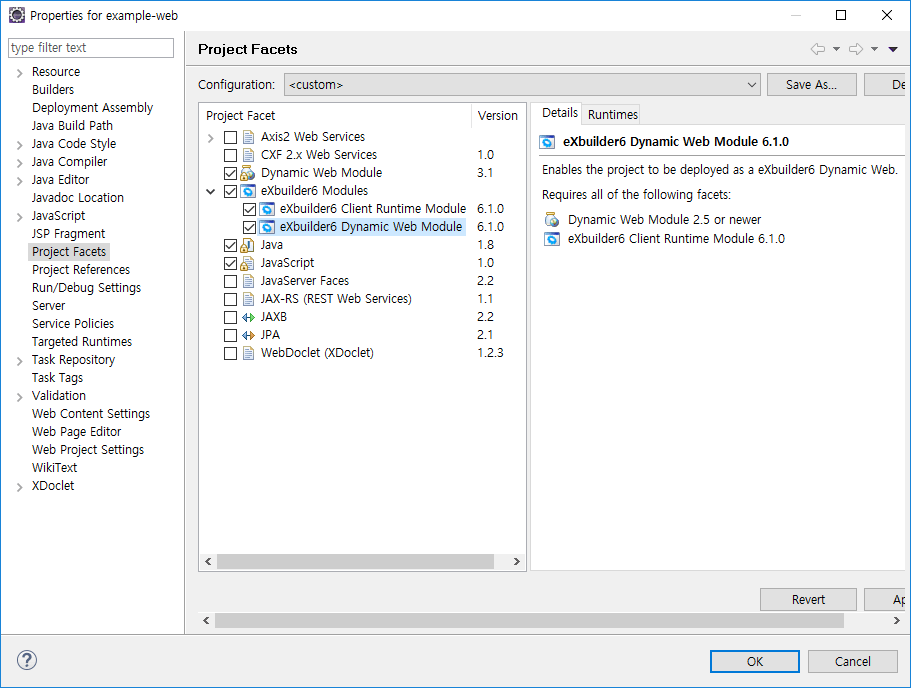
| Module Name | Description |
|---|---|
| eXBuilder6 Client Runtime Module | Determines whether to install JavaScript and basic Theme-related files that allow the eXBuilder6 execution environment to operate in the browser. |
| eXBuilder6 Dynamic Web Module | Determines whether or not to include server plug-ins that can help eXBuilder6 handle protocols in the Build Path. |
Setting up eXBuilder6 Facet for Dynamic Web Project
Select both modules in eXBuilder6 Modules of Project Facets and click the [Apply] button. The components required to link eXBuilder6 project are set in the web project.

| Path | Description |
|---|---|
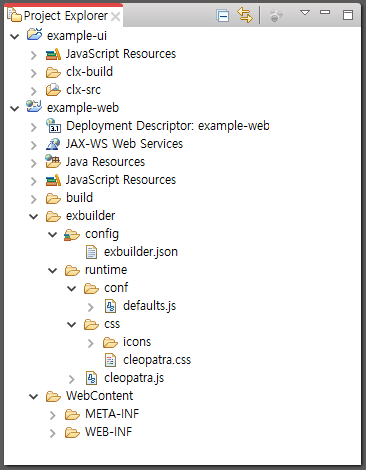
| /exbuilder/config | This is the path where the configuration file to be processed by the eXBuilder6 server plug-in is located. The list of JavaScript and CSS files to be used in the execution environment, the basic settings of FileUpload processing, and the distribution path of the eXBuilder6 project that are distributed together are stored. |
| /exbuilder/runtime/conf | This is the path where the default settings used in the execution environment are stored. |
| /exbuilder/runtime/css | This is the path where eXBuilder6 basic theme CSS files and related images are located. If changes are required, it is recommended to change the server settings after installing the CSS file in a separate path. |
| /exbuilder/runtime/cleopatra.js | Execution environment JavaScript file of eXBuilder6. |
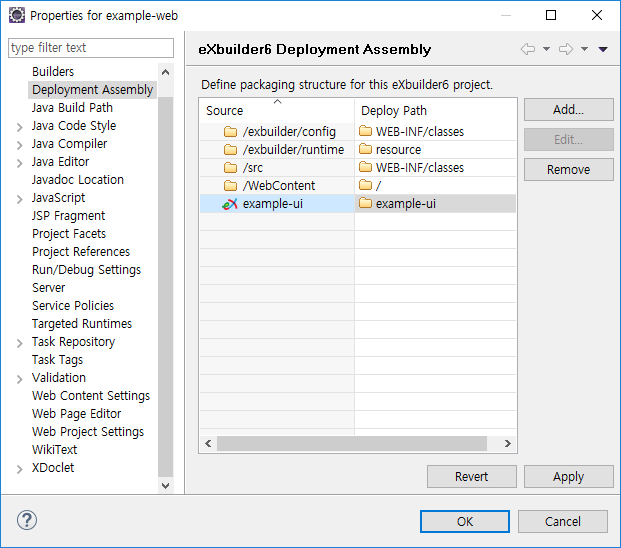
Deployment setting (Deployment Assembly)
Deployment settings provide a way to embed the eXBuilder6 project when the Dynamic Web Project is deployed. The process is similar to deploying a Java Project to a Dynamic Web Project.
Setting up Dynamic Web Project Deployment Assembly
Select File > New > eXBuilder Examples from the top menu and enter "example-ui" as the project name to create it.
Select Deployment Assembly in the Properties dialog of Dynamic Web Project.

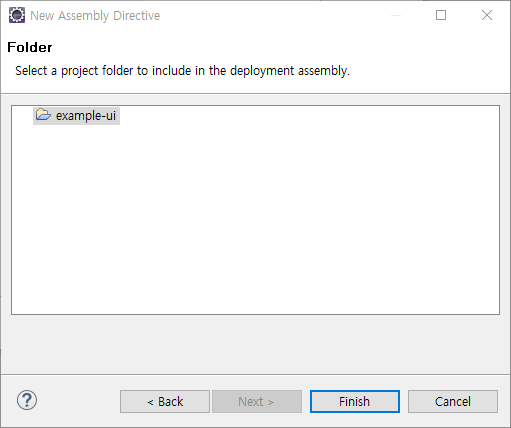
On the right screen, you can see that the distribution directory starting with exbuilder has been added due to Project Facet settings. Click the [Add] button on the right to display the New Assembly Directive dialog. Select eXBuilder6 Project in this window and click the [Next] button.
When a project is added, the added project is displayed on the list as shown in the screen above. You can change the path to be deployed by editing the right Deploy Path part. The distribution setting information added in this way is automatically reflected in the server setting file.