What is Column builder?
Column Builder is an extension tool that compose eXBuilder 6's data set or data column via information in database You have to install an extension in order to use Column Builder. The extension can be downloaded in the following address
* Column Builder Extension update site:Column Builder is categorized as the subcategory of Extensions(shown in the image below).
Database connection configuration
Database Column Builder Extension for eXBuilder6 composes column based on the database connection Database connection can be composed by using Data Tools Platform. Click Column Builder in order to use Column Builder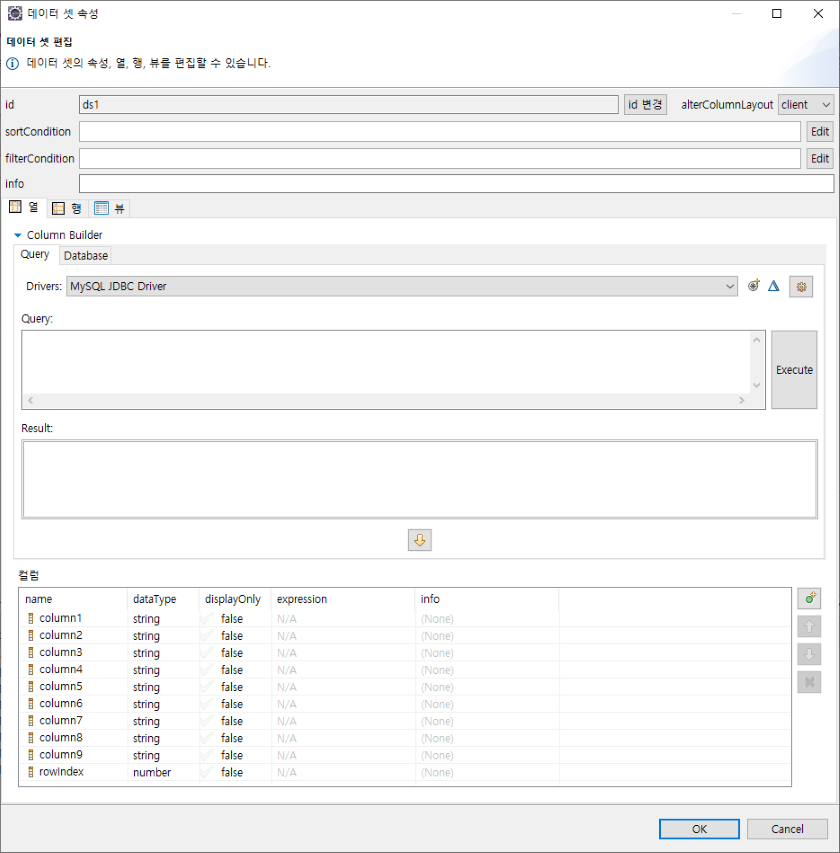
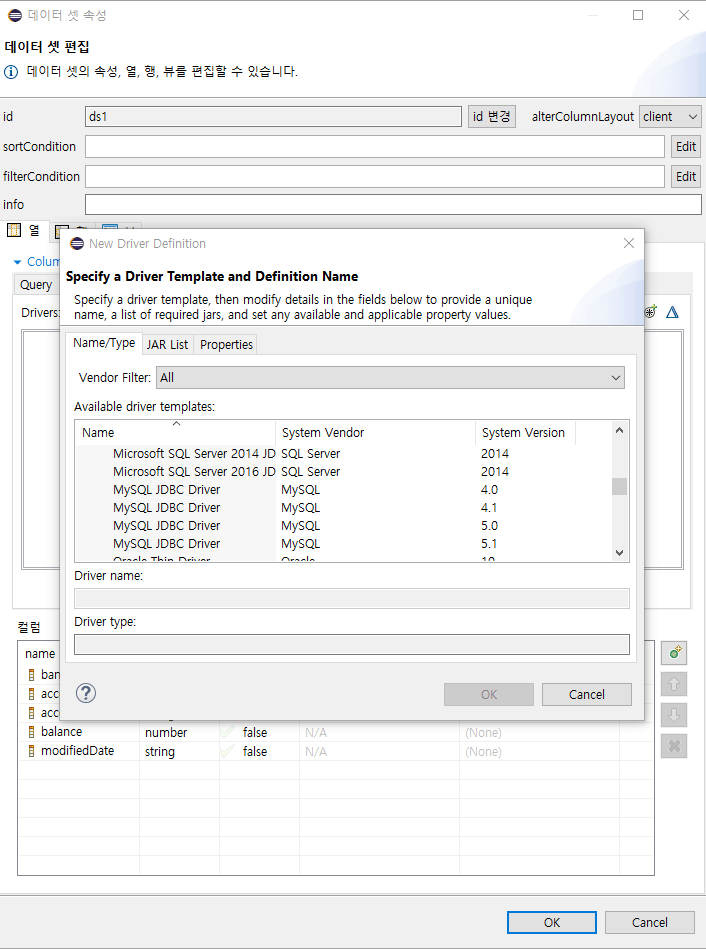
Create driver definition
Create a driver that will connect to a specific database.- Click the button
 .
. - Select a driver template in the Name/Type tab.
- Select Vendor Filter and only display the database of a specific supplier(Optional).
- Select driver template
- If there is already another driver with the same driver name, edit Driver Name(Optional).
- Select the file path of JAR or ZIP file, which are related to the driver, from the JAR List tab
- Click Add JAR/Zip.
- Find the file location of either JAR or ZIP.
- Click Open.
- Edit the default configuration of driver definition from Properties tab.
Notice: the option of Properties tab differ depending on the server type of the database. You can edit or input property from the Value box.
- Click OK.
Edit driver definition
Edit the existing driver definition.- Click
 .
. - Display or edit the paths of either driver-related JAR or ZIP file from the Jar List tab(Optional).
- Edit the default property of the driver definition template from the Properties tab.
Notice: options of the Properties tab differ based ono the server type of the database. You can edit or input a property from the Value box.
- Click OK.
Managing driver definition
Add, delete, or edit the driver definition.- Click
 .
. - Edit the driver definition by using button Add..., Edit..., Remove, Copy.
- ClickOK
You can add, delete, or edit the driver definition from Data Management > Connectivity > Driver Definitions category of the configuration.
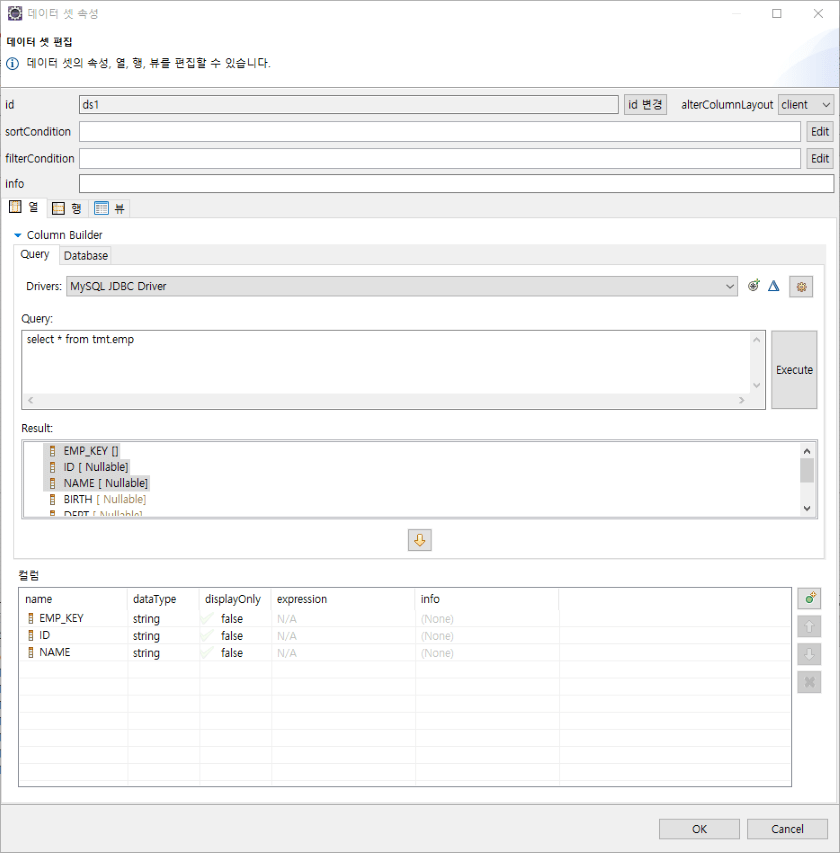
Composing a column by using query
You can search a column from the connected database by using query and and add it into either Data set or map.- Select driver definition from the Drivers combo box.
- Write a query that searches the column from Query.
- Execute the query by clicking Execute button.
- Select a column that will be added to either Data set or map from Result.
- Click
 to add the selected column.
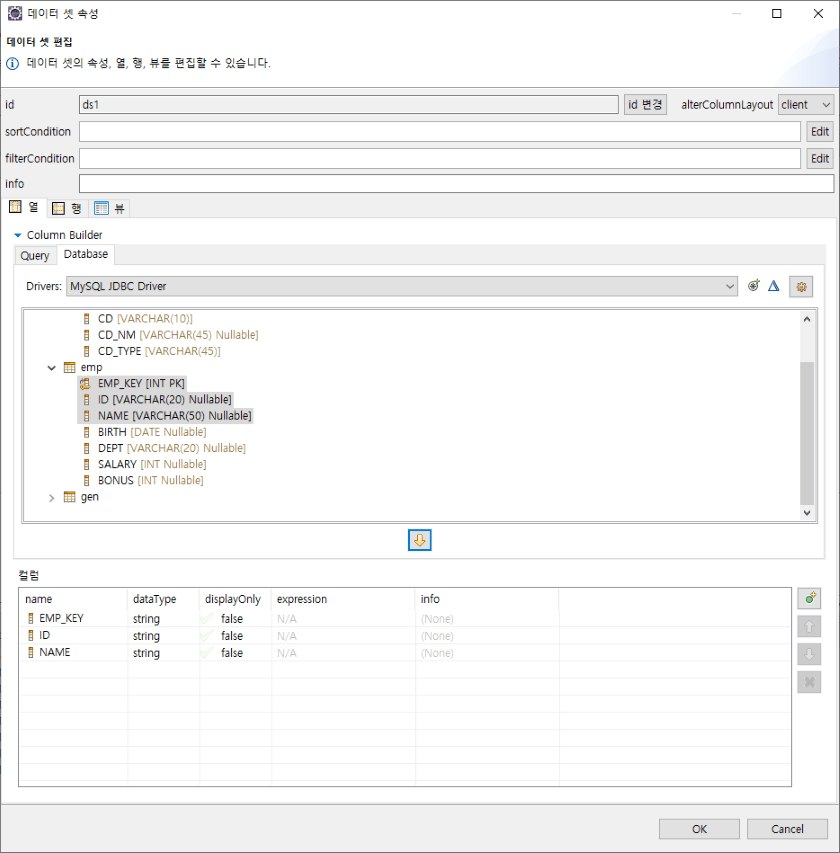
Composing a column by using a database
You can search a column from the connected database and and add it into either Data set or map.- Select a driver definition from the Drivers combo box
- Select a column that will be added into either Data set or map by expanding a table from the searched table.
- Click to add the selected column.
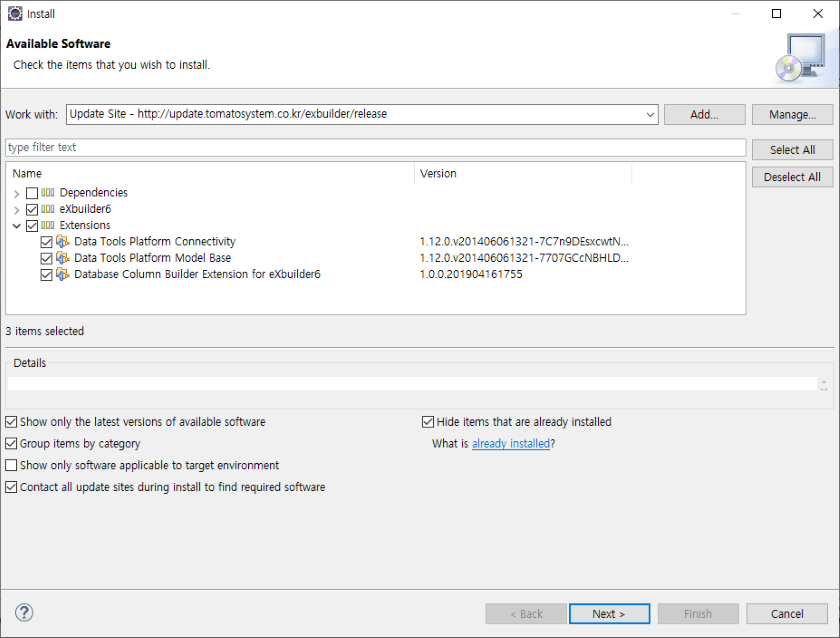
Installing the definition of the database
Database definition may not be installed in Eclipse if the eXBuilder6 and Column Builder were instlled as a plugin format. If the database definition is not installed, a message saying "Cannot find the database definition" will be displayed in the Column Builder item.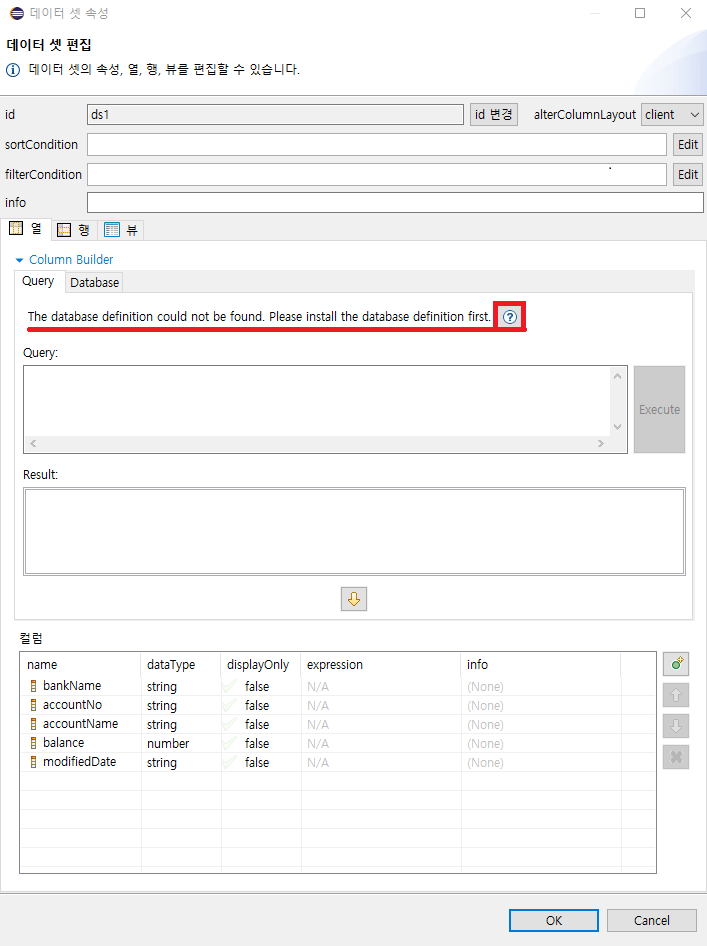
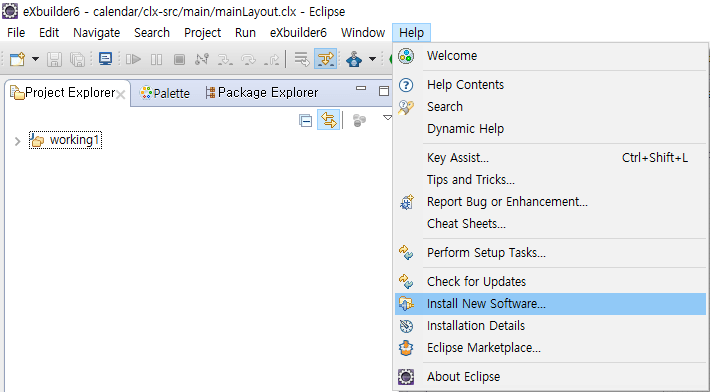
-
Open a install box by clicking Help > Install New Software... from the global menu.
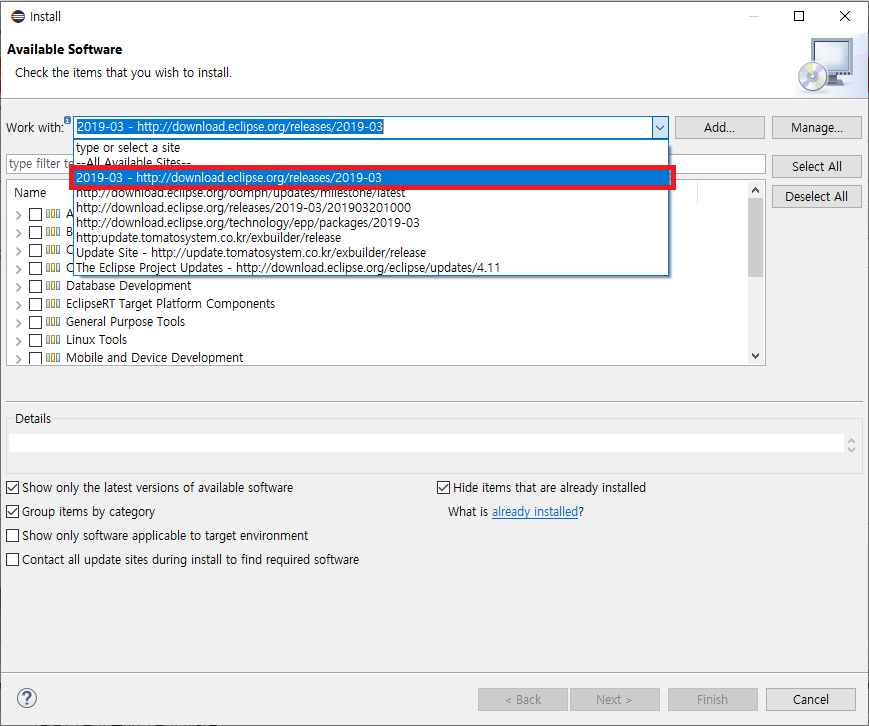
-
Select a release update site for the following Eclipse version in the "Work with".
-
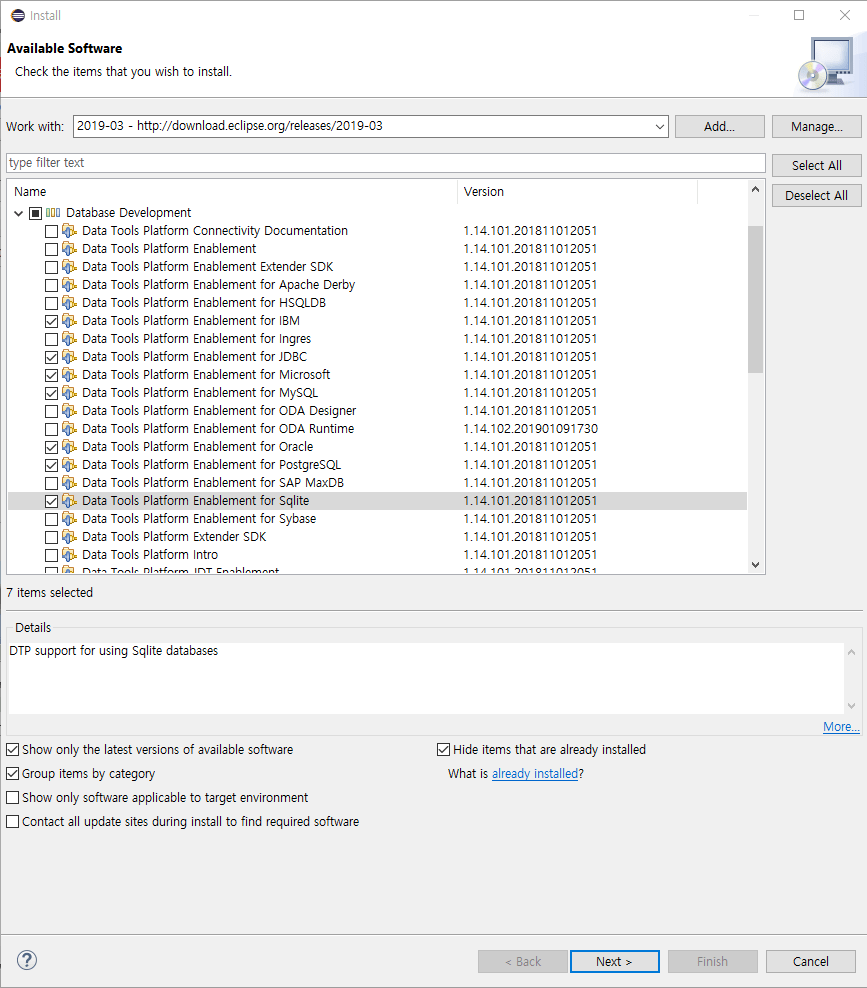
Select the plugin, which includes the definition of necessary database, from the list of componenets and click "Next" button to move to the next page. Usually, the name of the plugin that contains the definition of the database is structured like this: Data Tools Platform Enablement for <Database Product Name>
-
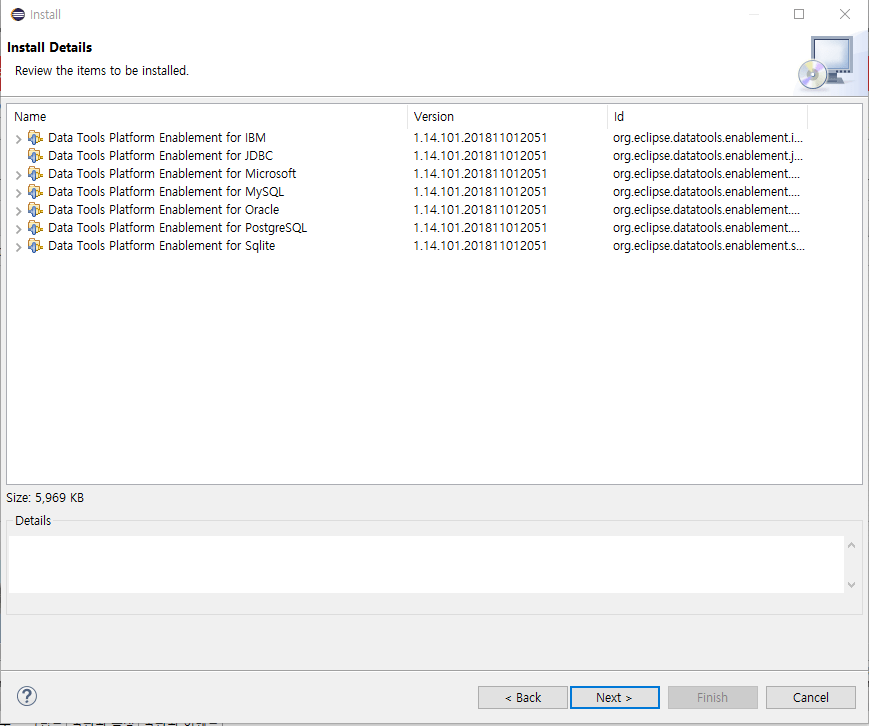
After checking the list of installed plugin, click "Next" button and move to the next page.
-
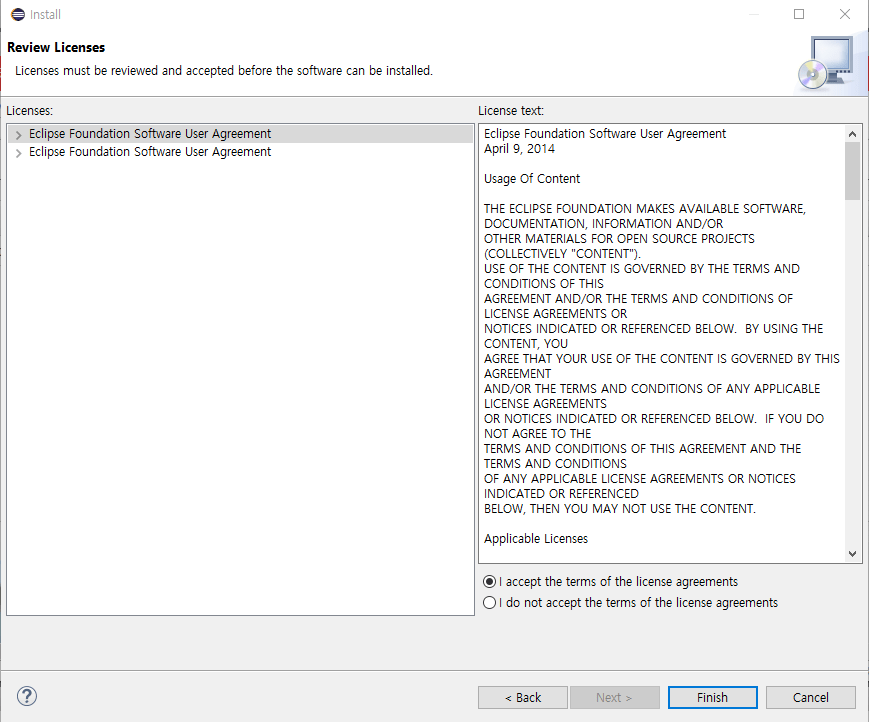
If you agree, agree by clicking I accept the terms of the license agreements section and move to the next page to continue the installation.
-
After completing the installation, if the dialog box shown in the below image pops up, restart the program by clicking Restart Now.

-
Once the installation is properly done, database connection can be created through the definition of the database in the column builder.